Table of Contents
- What Is the Z-Image Workflow Anyway?
- Mistake #1: Manually Cropping Z-Images vs Regenerating
- Mistake #2: The Z-Image Sequential Production Trap
- Mistake #3: Ignoring the Metadata Goldmine
- Mistake #4: Relying on Single-Input Tools
- Mistake #five: Neglecting Psychological Triggers – quick version
- How to Fix Your Workflow Today
- Listen to This Article
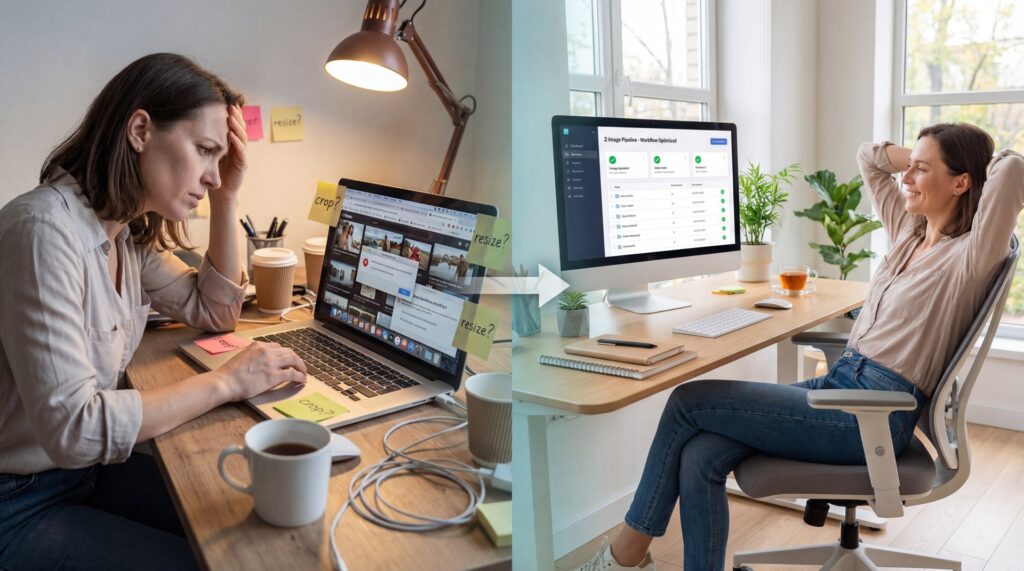
All right, so we’ve got a major issue under the hood of most content strategies today. I was looking at some data recently, and it turns out that content creators are spending an average of 4.2 hours per week just on image resizing and reformatting tasks. That’s a massive leak in your productivity pipeline. If you’re running a channel or managing a brand, you know that time is money.
Today we’re gonna go over the z-image workflow and why the old way of doing things is costing you views and hours of sleep. I see this all the time—creators trying to force square pegs into round holes with their visuals, using outdated methods that just don’t cut it in the 2026 space.
Now, here’s the thing. Here’s the deal. Most people think ai image generation is just typing a prompt and getting a picture. But if you aren’t using a proper z-image architecture, you’re basically driving a sports car in first gear. I’ve spent a lot of time testing these tools, and I wanna walk you through the five biggest mistakes I see people make. We’re going to fix this so you can get back to actually creating content.
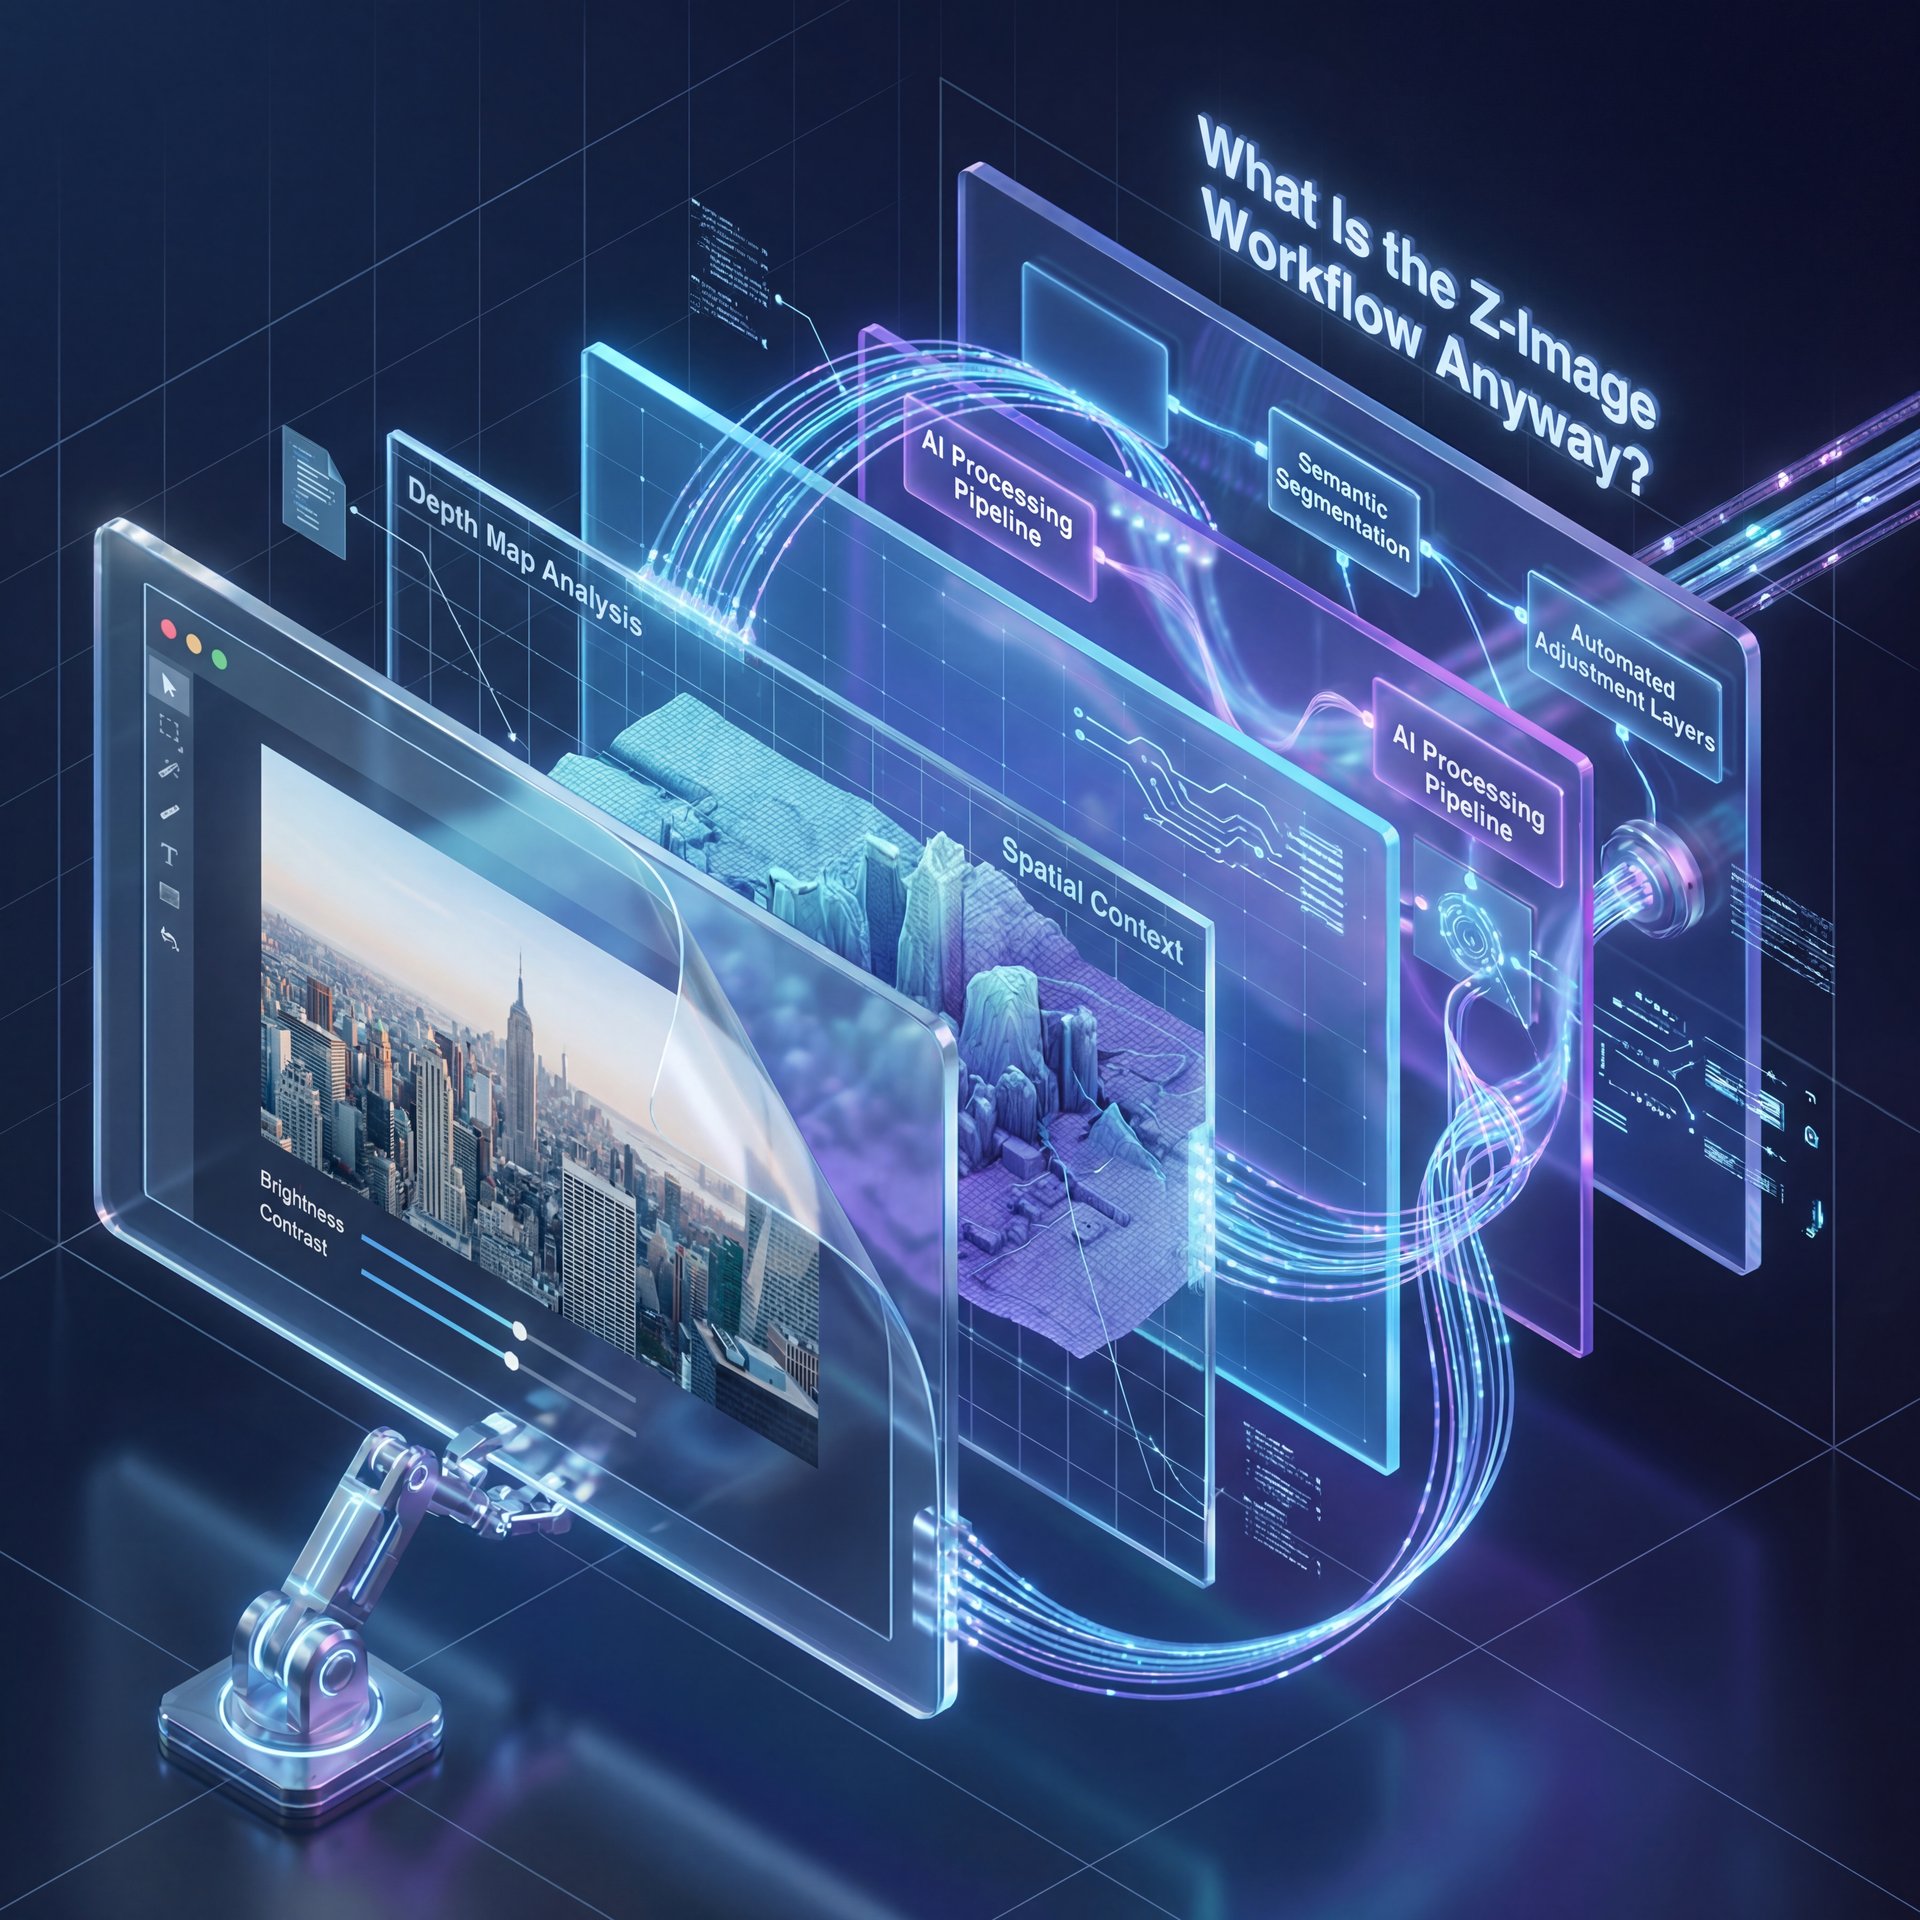
What Is the Z-Image Workflow Anyway?
(Sort of…)
Before we start pulling parts, let’s define what we’re working with. A z-image isn’t just a static JPEG. It’s a depth-aware, metadata-rich asset that understands where it’s going to live. Whether you’re using z-image turbo for speed or z-image base for foundational layouts, the goal is to stop treating images like flat stickers and start treating them like active assets.
I remember when I used to do everything manually in Photoshop. I’d spend hours tweaking shadows and highlights. It’s the workflow optimization — system saves hours. But the tech has moved on. If you aren’t using a system that understands the “z-axis”—the depth and context of your image. you’re already behind.
67% of Z-Image Thumbnails Fail on Metadata – Quick Version
Did you know that 67% of YouTube thumbnails miss optmization opportunities because they don’t integrate with video metadata? A z-image workflow analyzes your title and description before generating visuals.
Mistake #1: Manually Cropping Z-Images vs Regenerating
So, let’s look at the first big mistake. I see this constantly. You make a great thumbnail for YouTube, and then you just crop the sides off to make it fit TikTok or Instagram Story.
Here’s the problem with that. When you crop, you lose context. You lose the “air” around the subject. According to Social Media Examiner, 73% of creators lose critical visual elements when they simply crop images. It looks cramped. It looks amateur.
In my experience, the fix is to stop cropping and start regenerating. This seems where z-image tech shines. Instead of cutting the image, the AI looks at the subject and “outpaints” or regenerates the background to fit the new aspect ratio. Key takeaway. Your subject stays perfectly framed while the environment expands naturally around them.I used to use Canva for this, and. I like Canva for quick layouts, manually resizing and trying to stretch the background usually looks terrible. You end up with blurry pixels or weird distortions that scream “low quality” to both viewers and algorithms.
Pro Tip: Never stretch a background to fill space. It screams “low quality” to the algorithm. Always use AI generation to extend the scene naturally so the lighting and texture match perfectly.
When you use a tool that supports z-image generation, it keeps your subject perfectly centered and builds the world around them to fit a 9:16 vertical format or a 1:1 square. Sound familiar? It feels native to the platform, not like a repost.
Mistake #2: The Z-Image Sequential Production Trap
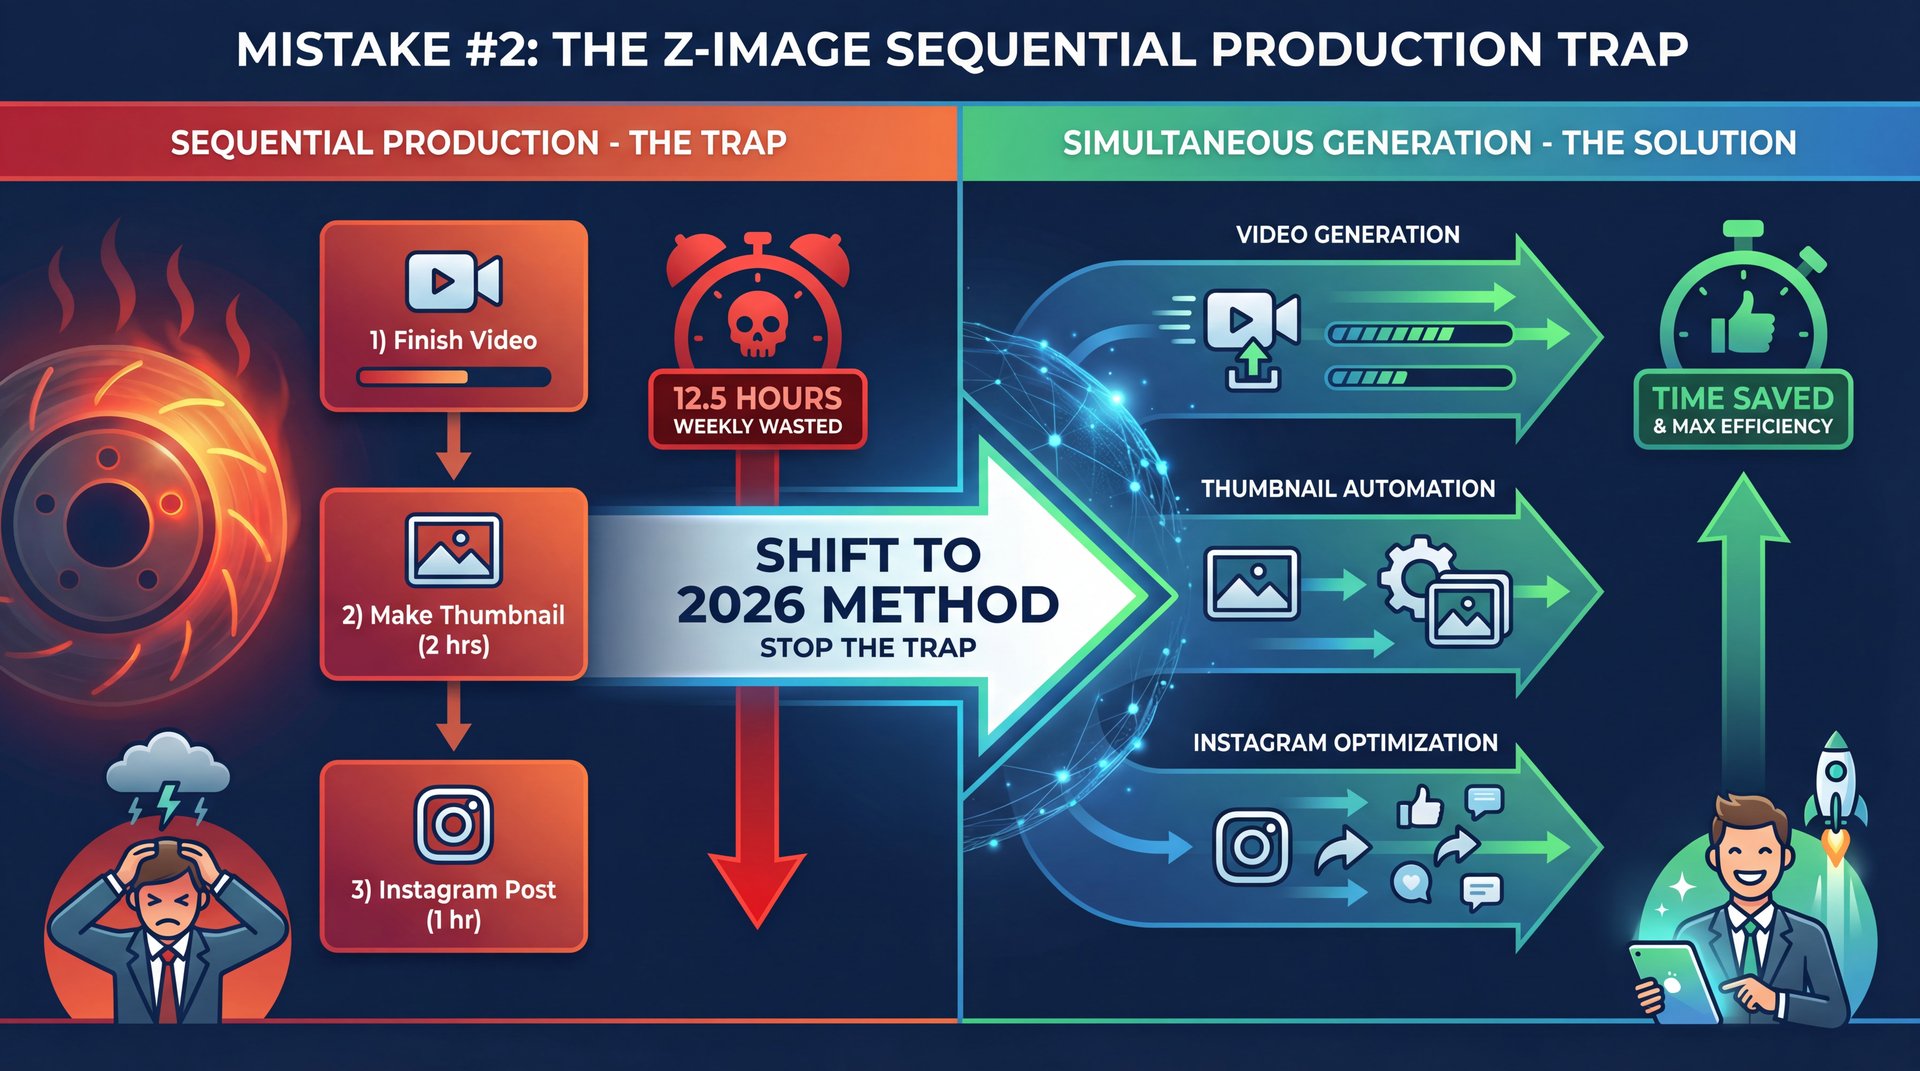
Now, if you’ve got this symptom (where you finish a video, then spend two hours making the thumbnail, then another hour making the Instagram post, you’re suffering from sequential production. Trust me.
Content teams waste an average of 12.5 hours weekly by doing this. It’s like fixing the brakes, putting the wheels back on, and then realizing you needed to change the rotors too. You’re doubling your labor for no reason.
(While I’m at it…)
In 2026, high-output teams use simultaneous generation instead. I found that when I switched to a unified system, my stress levels dropped quickly. You want to feed your core concept into the z-image turbo engine and let it spit out every format at once.
(Sound familiar?)
Here’s what you want to do. You input your video topic, your core image idea, and your text. Then the system should generate the YouTube thumbnail, the LinkedIn header, the Twitter card and the Instagram Story simultaneously.
This ensures visual consistency. If you change the font color on the thumbnail, it should update across the board, so you can’t do that easily if you have five different Photoshop files open. Plus, according to recent data, 73% of social media managers grabbed 3 or more seperate tools for visual content creation, causing workflow fragmentation. It’s about working smarter, not harder.
Mistake #3: Ignoring the Metadata Goldmine
All right, let’s go under the hood for a second. This is the technical stuff that actually makes you money.
A flat image is just pixels. However, a z-image is pixels plus data — Actually, scratch that —. Mistake #3 is creating images in a vacuum. I see creators make a thumbnail that looks cool but has nothing to do with the actual keywords in the video title.
If your ai image generation tool isn’t reading your video title, tags, and description, you’re flying blind. Period. We know from TubeBuddy’s data that thumbnails aligned with metadata perform way better.
Here’s How This Works in Practice
Say your video is about “fast cars,” but your thumbnail is just a picture of a wrench. In that case, the algorithm gets confused. Still, if your system reads “fast cars” and suggests eye-catching motion blur and red colors (which trigger excitement), you’re aligning the visual with the data. AI-optimized thumbnails that analyze video metadata achieve 24-31% higher CTR compared to manually designed alternatives.
I’ve noticed that when I use tools that analyze my script or description before generating the image, the results are way more relevant. It takes the guesswork out of “what should I put on the thumbnail?” Also, this is critical because 67% of YouTube thumbnails miss optimization opportunities by not analyzing video titles and descriptions during creation, reducing CTR by up to 24%.
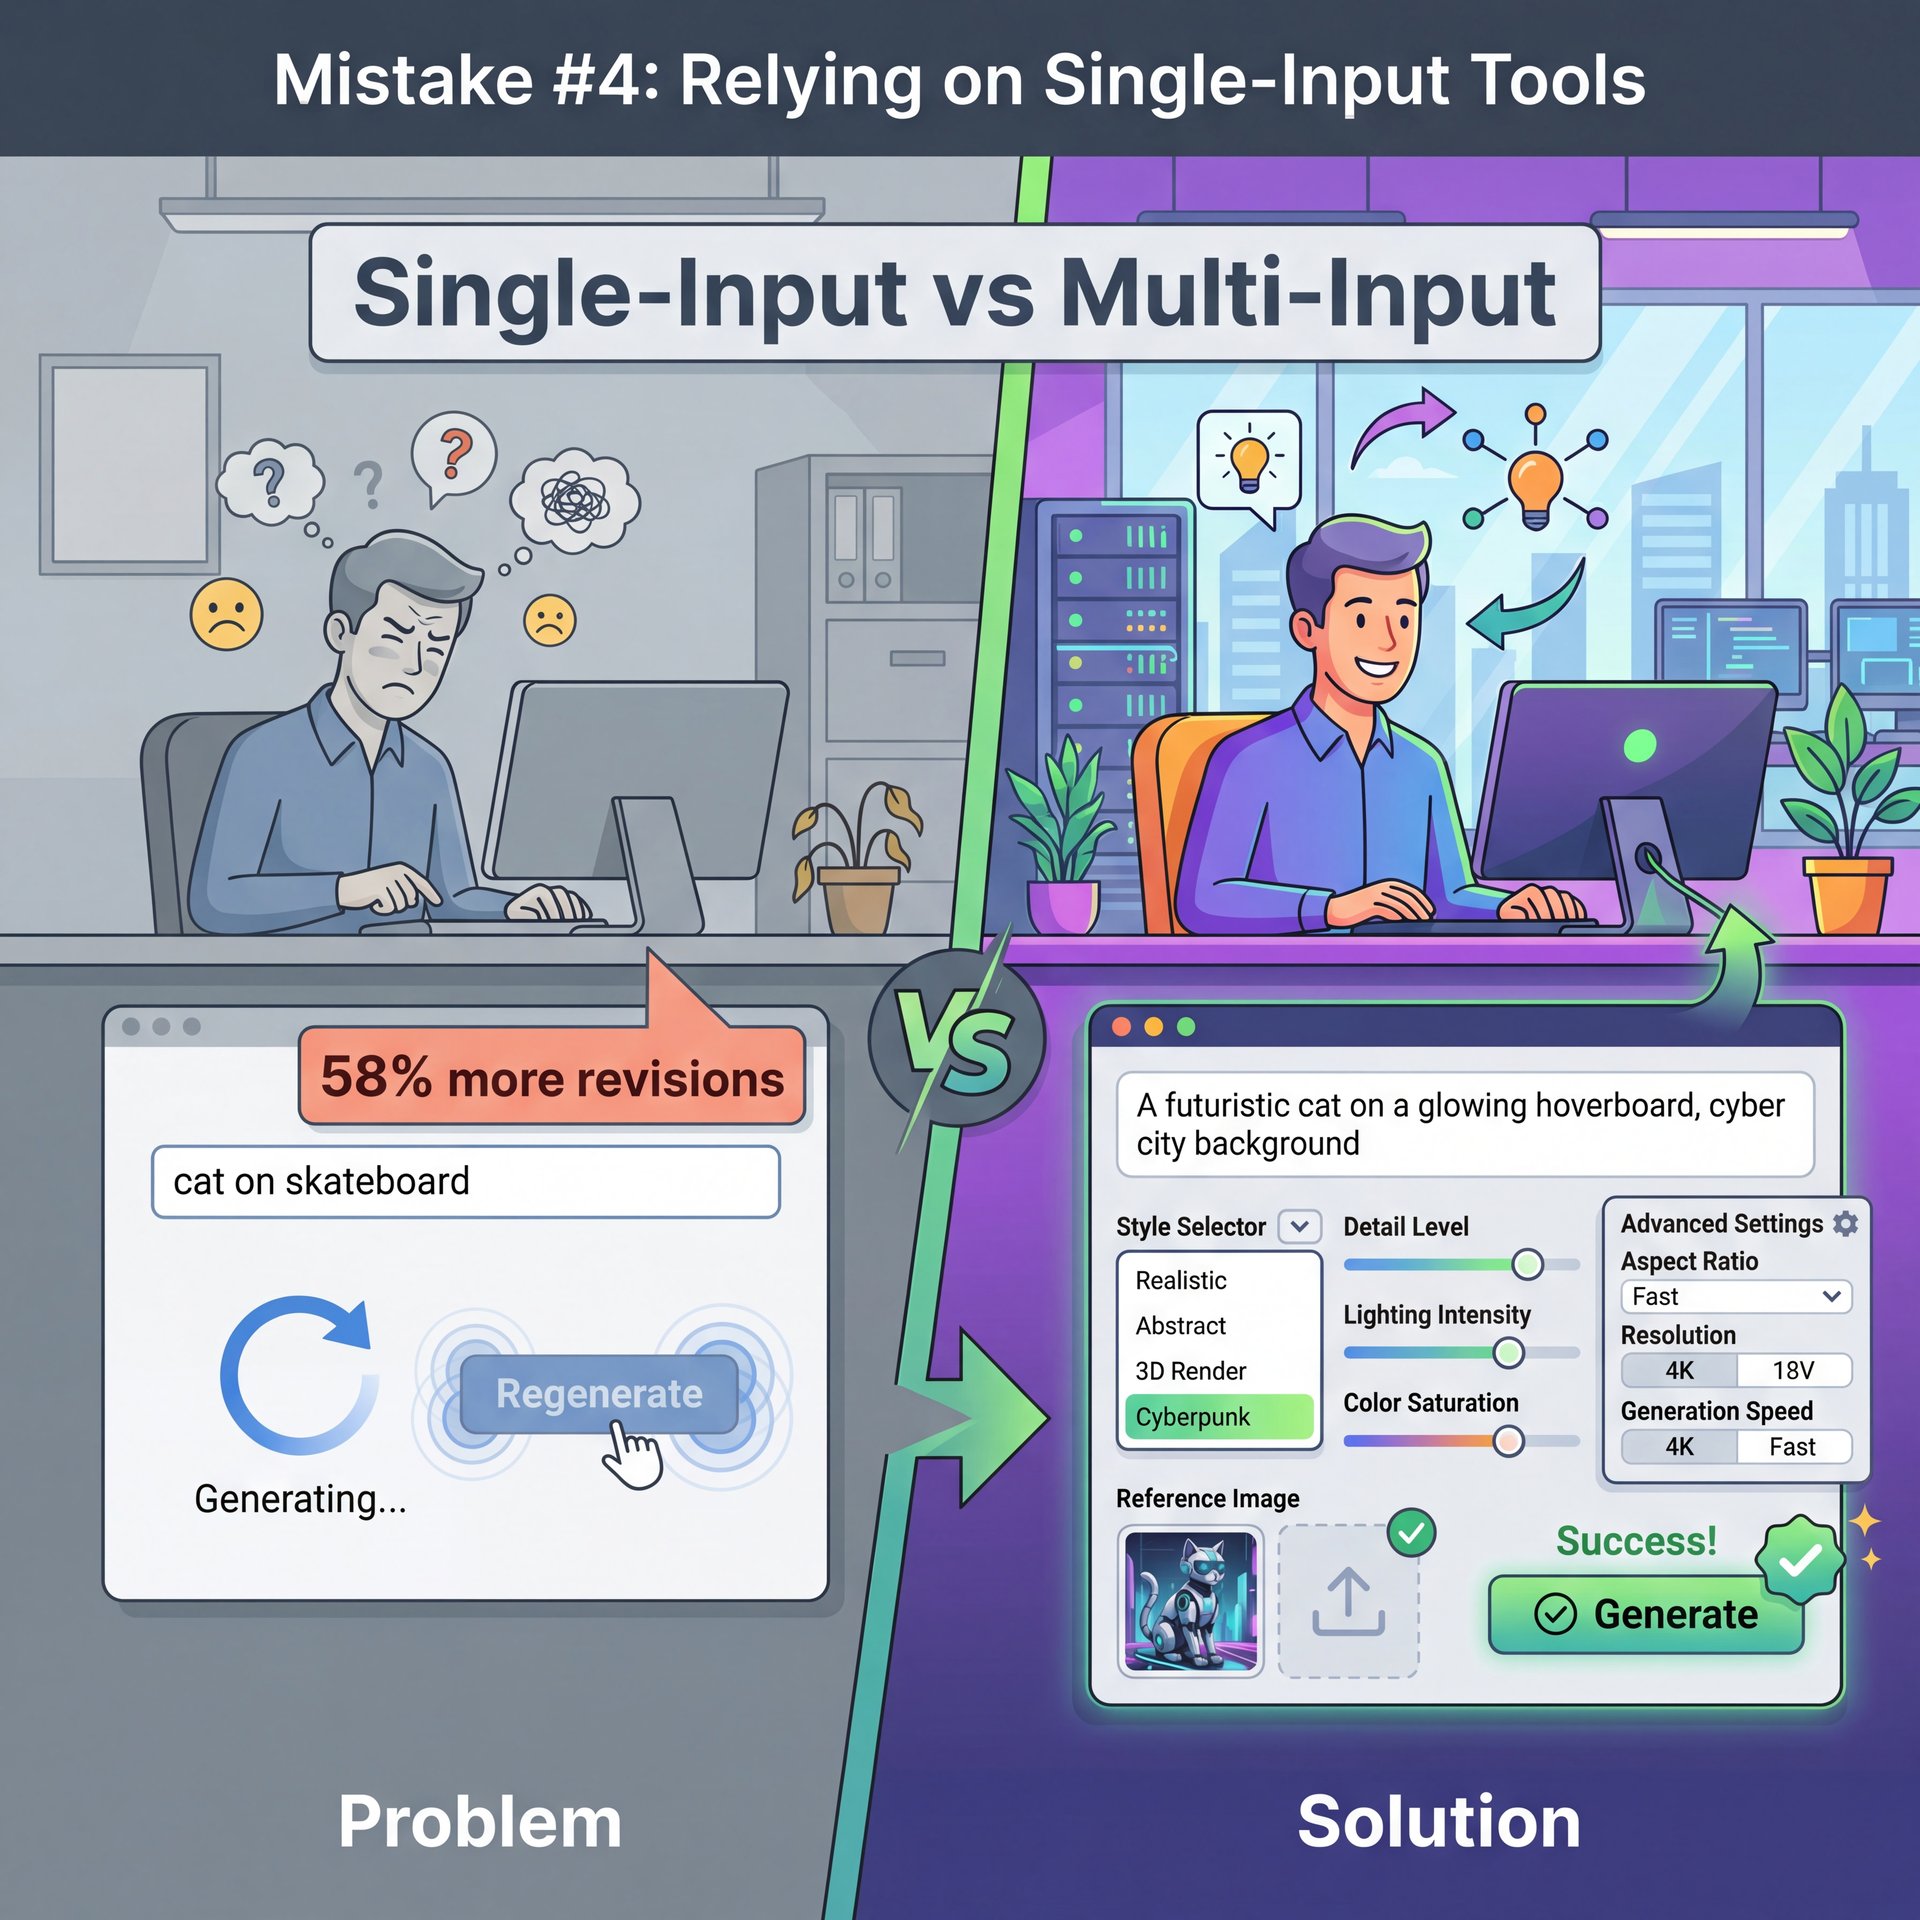
Mistake #4: Relying on Single-Input Tools
(Hard to say.)
This one drives me crazy. You go to a generic AI generator, type “cat on a skateboard,” and hope for the best. That’s a single-input system. It’s like trying to diagnose an engine rattle just by listening to the exhaust. You aren’t getting the full picture.
Generic AI image generators that process only one input create 58% more revision cycles. You spend all your time hitting “regenerate” hoping for a lucky break, which is incredibly frustrating.
Real z-image workflows use multi-input analysis. This means the system looks at:
- The background layer
2, the subject layer
3, the text overlay
- The emotional tone
**Isolate Your Elements**
Don’t ask for the whole image at once. Separate your subject (the “hero”) from the background environment in your prompt strategy.
**Layer the Z-Depth**
Use **z-image base** settings to create the background depth first, ensuring it doesn’t clash with your text readability.
**Apply Turbo Processing**
Run the **z-image turbo** pass to blend the lighting between your isolated subject and the new background so it looks like one cohesive photo.
When you control these elements separately but process them together, you get a result that looks professional straight away. You aren’t fighting with the AI to get the text right because the text is a separate layer in the z-stack.
If you’re struggling with getting your AI prompts to work for these specific layers, you should check out our guide on 5 ChatGPT Image Prompt Mistakes Killing Your CTR. It breaks down how to structure these inputs so you don’t get weird results.
Mistake #five: Neglecting Psychological Triggers – quick version
Now, if you fix everything else but miss this, it won’t matter. You can have the highest resolution z-image in the world, but if it doesn’t click with the human brain, it fails.
I see so many technically perfect – like, really perfect images that are boring. They lack the “punch.” Thumbnails without Face Focus, Curiosity Gap, or Shock & Awe elements generate 42% lower engagement, yet 81% of creators don’t systematically apply these principles.
The Three Core Triggers
What are these triggers that actually work? First, there’s Face Focus, humans are wired to look at faces. In fact, thumbnails with prominent human faces generate 38% higher click-through rates than those without facial focus. Second, you need Contrast. high contrast stops the scroll dead in its tracks. Third, there’s Curiosity, hiding something or showing a surprising result makes people need to know more.
⭐ The “Shock & Awe” Effect
Creator Sarah Jenkins switched to a z-image workflow that automatically enhances facial expressions and boosts contrast. She cut her production time by 8 hours a week and saw a 35% CTR bump.
I personally prefer to use the “Shock & Awe” method. I want the viewer to feel something straight away. If, the image is too flat or the colors are too muted, they scroll past without a second thought.
There was a study by HubSpot that showed visuals are processed 60,000 times faster than text. You have milliseconds. If your z-image workflow doesn’t automatically enhance saturation and sharpness on the focal point, you’re leaving views on the table.
Also, be careful with clutter. A common issue I see is people trying to pack too much info into one square. We talk about this a lot in our article on 9 AI Thumbnail Mistakes Killing Your Views. Trust me on this. You want one clear focal point, not a “Where’s Waldo” puzzle.
How to Fix Your Workflow Today
So, how do we fix this? You need to stop looking at image creation as a separate, isolated task. It has to be part of a unified system that works with you, not against you.
First, audit your current tools. If you’re opening three different apps to make one thumbnail, stop. Look for a solution that handles z-image layering natively so everything flows together.
Second, stop cropping. If you need a vertical video asset, regenerate the background. It looks better and performs better because the composition is intentionally designed for that format.
📊 The 2026 Difference
Before: 4 hours/week resizing, 3 different apps, inconsistent branding.
After: 20 minutes/week using unified z-image workflows, 3x faster production cycles, consistent look across all channels.
Third, use the data. Don’t guess what colors work. Let the metadata guide the design so you’re making decisions based on what actually performs, not just what looks cool to you.
I’ve found that once you get this dialed in, it’s not just about saving time, though saving 8-15 hours a week is nice. It’s about sanity. You get to focus on being creative again instead of being a pixel pusher stuck in production hell.
Pro Tip: Set up a “Master Style” in your z-image settings. This ensures that every single image generated, whether it’s for LinkedIn or YouTube, uses the same color grading and font hierarchy automatically.
These tools are ready for you. Z-image turbo tech is available right now. You just have to decide to stop doing it the hard way and embrace what’s actually working in 2026.
💡 Quick Tip: The 60-Second Rule (the boring but important bit)
If generating a thumbnail variation takes you longer than 60 seconds, your workflow is broken. Big difference. AI Creative Directors can handle multi-input processing in under a minute.
That should fix this if you’ve got these symptoms. It’s not magic, it’s just better mechanics working for you instead of against you.
Frequently Asked Questions
What is the difference between Z-Image Turbo and Base?
Z-Image Base handles the foundational layout and depth structuring, while Turbo focuses on high-speed rendering and blending for rapid output.
How does metadata integration improve my thumbnails?
By analyzing your video title and tags, the AI selects colors and imagery that align with search intent, which can boost CTR by up to 24%.
Can I use these tools for Instagram and TikTok too?
Yes, modern z-image workflows allow you to generate assets for all social platforms simultaneously without manual cropping.
Quick Tips:
- Always regenerate backgrounds for different aspect ratios instead of cropping. – Use facial focus features to increase engagement by up to 38%. – Integrate your video metadata into the image generation process for better relevance.
Listen to This Article
